Is your Realtek audio driver automatically installing itself and you don’t know how to stop it? If yes, then read this article providing different methods to fix this issue within minutes.
Realtek drivers are your computer’s sound drivers. It gives you the Realtek Audio Manager, which lets you improve the stability and quality of your sound as well as control your connection. Your computer may have the Realtek audio manager installed because your motherboard has a built-in sound card.
However, Realtek Audio Manager doesn’t seem to work very well in Windows 10, which has caused a lot of people to complain. It seems like nowadays Windows keeps updating the Realtek audio drivers as soon as there is a new update. If you try to get rid of the program using the uninstaller, you’ll just get stuck in a loop because that will also get rid of the latest sound drivers.
Some people might find the Realtek sound manager annoying or it might not work at all for them. If you don’t like it, here’s how to get rid of it while keeping your sound card working.
Methods To Stop Realtek Driver’s Automatic Installation
To stop the automatic installation process there are three things you can do. The first is to disable the Realtek audio driver using Windows in-built tool. The second one is to roll back the Realtek driver, this will also help you with the same.
The last one is to uninstall the Realtek High Definition Audio driver from your computer using the Control Panel. All these methods are properly explained below, so without wasting any time let’s jump right into it.
Disable Driver Using Windows Integrated Tool
As Windows users face these kinds of problems now and then. They have introduced tools and troubleshooting features that will help you get rid of them. Likewise, in this case, we are going to use the Device Manager tool to disable the Realtek driver and stop its automatic installation process. Below are some steps that will help you with the process.
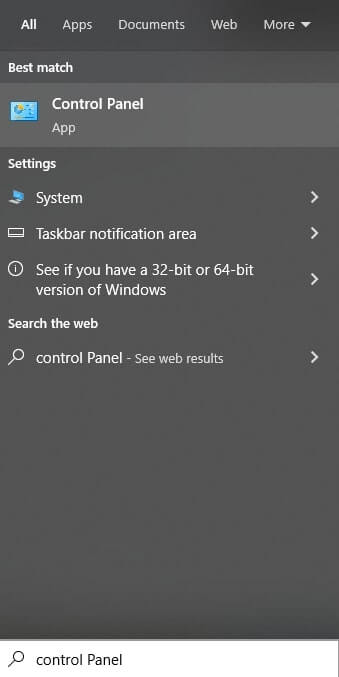
Step1: Type Control Panel in the taskbar’s search bar and then press the Enter key on your keyboard
Step2: Click on the “View by” dropdown menu and select “Large icons” to change the icon’s design. Now, click on the Device Manager option to open it.

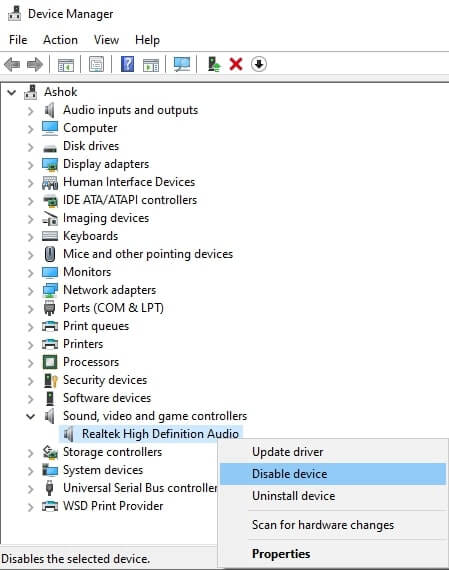
Step3: On the device manager window, click on the arrow in front of “Sound, video and game controllers” to expand it. Then, right-click on the “Realtek High Definition Audio Driver” option and select the Disable Device option.
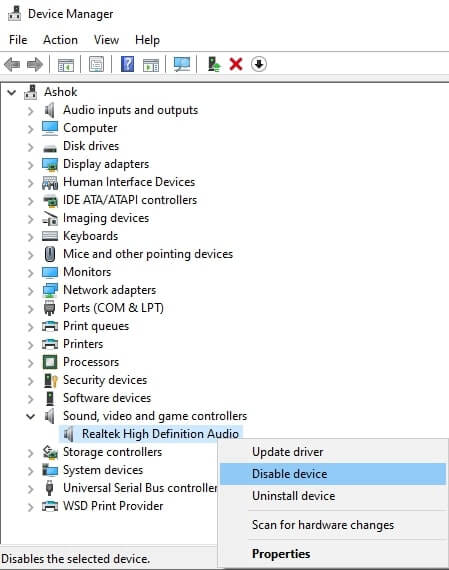
This will disable the program from running and as a result, Realtek will no more automatically install on your Windows device.
Roll-back The Realtek Driver
Rolling back drivers is again a feature that you will find in the Windows device manager tool. This feature installs the driver’s old version, which was safe to use. Follow the steps mentioned below to stop the Realtek automatic installation process.
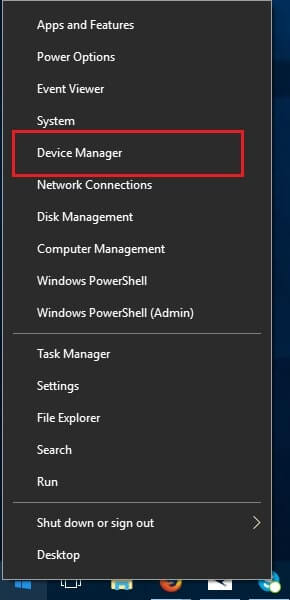
Step1: Right-click on the Start menu and select the Device Manager tool from the list
Step2: On the device manager window, double-click on the “Sound, video and game controllers” option to expand it
Step3: Right-click on the Realtek High Definition Audio Driver and select the Properties option
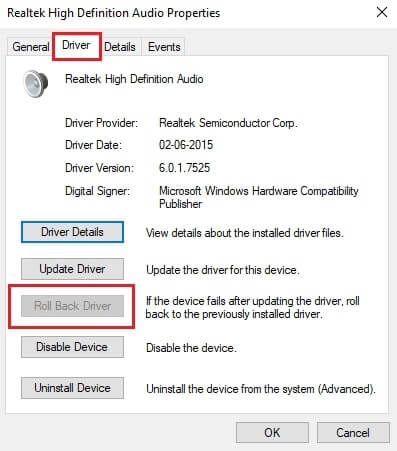
Step4: Select the Driver tab on the Properties window. Then, click on the Roll Back Driver button to start the process.
When the process is finished, Restart your computer. This will install the Windows standard driver instead of the problematic driver.
Uninstall Realtek Driver
If you still face the same issue even after rolling back the drivers. Then, you need to uninstall the Realtek driver from your Windows device. Below are some steps that will help you uninstall the audio driver from your computer.
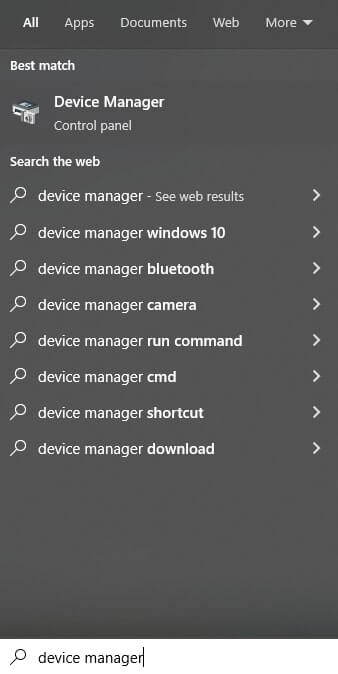
Step1: Search Device Manager in the taskbar and press the Enter key
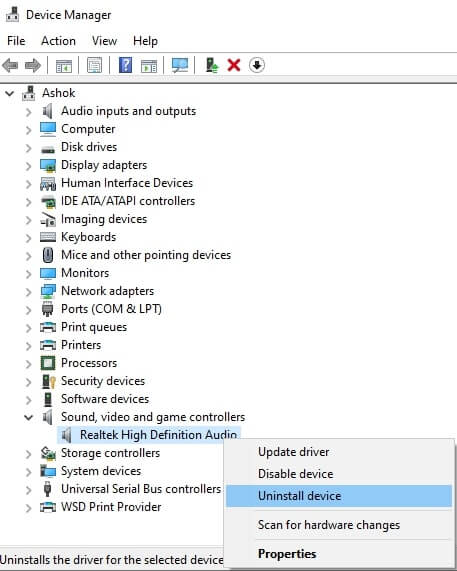
Step2: On the device manager window, double-click on the “Sound, video and game controllers” to expand it. Then, right-click on the Realtek High Definition Audio Driver and select the Uninstall device option.
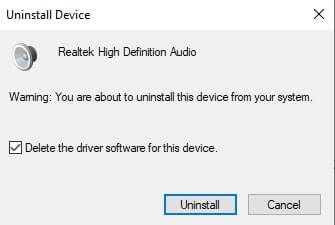
Step3: A pop-up window will appear, check the box that says “Delete the driver software for this device”. Then, click on the Uninstall button to start the process.
Step4: When the uninstallation process is completed, Restart the device and you will no longer face this issue.
Summing Up
These were some of the most effective and efficient ways with which you can stop the Realtek audio service’s automatic installation process. Kindly, implement the fixes, in the same manner, they are mentioned in this guide. If in case you are still entangled in this situation, then you should better contact Windows Support for a professional opinion.
You can always share your thoughts and suggestions regarding this post in the comments section below.


